Control Panel Commissioning Checklist for Startup and System Handoff
Installing an industrial control panel is only part of the job. The first startup is where the real validation happens. Wiring, programming, safety circuits, and field devices all come together during commissioning. If something was overlooked during fabrication or installation, the first energization will expose it.
A structured commissioning process reduces startup delays and prevents avoidable failures. It also creates documentation that helps operators and maintenance teams support the system after handoff.
This checklist focuses on commissioning a completed and installed control panel. It is different from specifying or purchasing a panel. The goal here is to safely energize the panel, confirm that field devices operate correctly, validate alarms and safety circuits, and deliver a system that the owner can operate with confidence.
Why Commissioning Matters After Panel Installation
Even well built panels can encounter problems during the first startup. A loose terminal, a mislabeled cable, or a sensor wired to the wrong input can cause hours of troubleshooting if the system is powered without preparation.
A disciplined commissioning process helps identify issues early while the system is still under controlled conditions. It also prevents equipment damage. Drives, contactors, and PLC modules can fail quickly if the panel is energized with wiring errors or incorrect voltage.
Commissioning also confirms that documentation reflects the actual installation. Drawings, PLC programs, and alarm lists should match what operators see on the plant floor.
Pre-Power Inspection Checklist
Before any power is applied, the panel should be inspected carefully. This step often catches the majority of installation problems.
Mechanical and enclosure inspection:
- Verify panel mounting is secure and level
- Confirm conduit entries are sealed and strain relief is installed
- Check enclosure doors and grounding straps
Terminal and wiring inspection:
- Confirm field wiring matches the drawings
- Check that terminal numbers match the I/O list
- Inspect ferrules and terminations for loose connections
- Verify torque on power distribution terminals
Loose power terminals are one of the most common causes of early panel failures. Thermal cycling during the first few hours of operation can quickly expose poor connections.
Grounding verification:
- Confirm equipment ground is connected to the panel ground bar
- Check grounding between subpanels and main enclosures
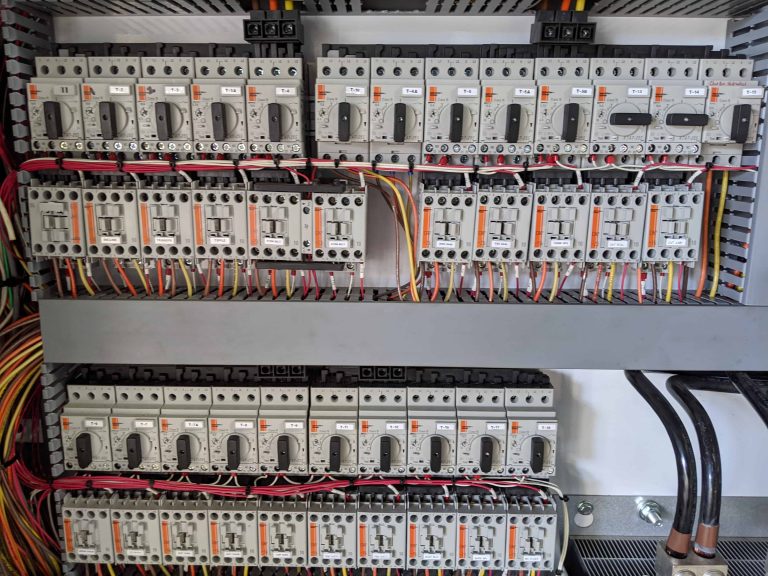
Component inspection:
- Confirm circuit breakers are sized correctly
- Verify PLC modules and network cards are seated properly
- Confirm fuse ratings match the design documentation
Initial Panel Energization Procedure
Once the pre-power inspection is complete, the panel can be energized in stages. Start by applying incoming power with all downstream loads disconnected or disabled.
Verify incoming voltage:
- Measure voltage at the main disconnect
- Confirm phase rotation if three phase power is used
- Check control transformer output voltage
Energize control power circuits:
- Confirm PLC power supply output
- Verify HMI or industrial PC boots properly
- Confirm network switches power up
PLC and Network Verification
Once control power is stable, confirm the automation hardware is communicating properly.
PLC startup checks:
- Confirm PLC boots without faults
- Verify program version matches the project documentation
- Confirm processor time and date settings
Industrial network checks:
- Confirm communication between PLC, HMI, and remote I/O
- Verify IP addresses match the network documentation
- Check that managed switches show normal link status
I/O Checkout and Field Device Validation
After the PLC and network are operating normally, the next step is verifying field devices.
Input verification:
- Activate each sensor and confirm the correct PLC input changes state
- Verify analog inputs display reasonable values
Output verification:
- Command each output from the PLC or HMI
- Confirm the correct device responds
Functional System Testing
After individual I/O points are validated, test the system as a complete process.
- Equipment startup and shutdown sequences
- Interlock verification between devices
- Timer and delay functions
- Process feedback responses
Alarm and Safety Validation
Safety circuits and alarms should never be assumed to work correctly without testing.
Emergency stop validation:
- Activate each E-stop station
- Confirm equipment shuts down immediately
- Verify system reset procedure works correctly
Alarm testing:
- Simulate sensor faults where possible
- Confirm alarms appear on the HMI
- Verify alarm messages are clear and accurate
Documentation and Owner Handoff
A successful commissioning process should end with complete documentation.
System documentation:
- Final electrical drawings
- Updated I/O list
- Network address map
Automation files:
- Archived PLC program
- HMI project backup
- Firmware version records
Operational documentation:
- Alarm list and descriptions
- Startup and shutdown procedures
- Spare parts recommendations
Final Thoughts
Control panel commissioning is a structured validation process that confirms wiring accuracy, program operation, device communication, and safety system performance. Taking the time to follow a disciplined workflow prevents costly downtime later and ensures operators receive a system that behaves predictably and is supported by clear documentation.
Svend Svendsen is the principal owner and a certified electrical engineer at Automation Electric & Controls Inc. Svend has decades of panel building experience specializing in custom industrial control systems, motor control panels, operator consoles, automated control systems, and custom control trailers. Automation Electric and Controls Inc. is a licensed ETL 508A panel building shop.